Wanna Make Popular Danish Biscuits at Home? This is the recipe!

Cookies become one of the mandatory snacks that are often served in various major religious celebrations, such as Christmas and Eid. The form also varies, not only limited to "nastar" and "kastengel" but can also be typical Danish butter cookies that we are familiar with the term popular danish biscuits.
It's dry and crispy texture is the main attraction that makes these Danish pastries so attractive to our society, especially ahead of Christmas celebrations like this season. Even on weekdays, popular danish biscuits are often used as a complementary snack when we enjoy a cup of hot tea in the morning or evening. But did you know? If in fact, you can easily make it at home too. Yep, if at the end of this year you have the opportunity to enjoy an extended vacation leave, you can set aside one full day to try to make your own. The ingredients are relatively easy to get, and how to make it is guaranteed not to make you scratch your head.
It's dry and crispy texture is the main attraction that makes these Danish pastries so attractive to our society, especially ahead of Christmas celebrations like this season. Even on weekdays, popular danish biscuits are often used as a complementary snack when we enjoy a cup of hot tea in the morning or evening. But did you know? If in fact, you can easily make it at home too. Yep, if at the end of this year you have the opportunity to enjoy an extended vacation leave, you can set aside one full day to try to make your own. The ingredients are relatively easy to get, and how to make it is guaranteed not to make you scratch your head.
Are you ready to make it? Let's prepare the following ingredients first:
1. Prepare 150 grams of butter. For the butter itself, you can use salted butter that tastes salty, or if it's not available, you can use unsalted butter with half a teaspoon of salt added. The taste is 11 12 (almost the same) hehe, but if salted butter is available, my recommendation is just to choose the salted one.
2. Prepare also 50 grams of margarine. Remember margarine; the first was butter. Now, this is margarine. Usually, the color is different; usually, butter is whiter than margarine. And the butter aroma is stronger.
3. Also, prepare about 320 grams of medium / low protein flour. Here I write two optional, a namely medium or low protein with the intention that if you want to make a dry and crispy one, you can choose the low protein one, while if you want to make a not too dry one, you can use flour with medium protein. The important thing is not to choose wheat flour with high protein, because usually high-protein flour is only used for making cakes such as donuts or bread.
4. Prepare also about 100 grams of refined sugar. Especially for this one ingredient, you can add or subtract according to your taste. If you want to make popular danish biscuits that are sweet enough, you can add them, but if you feel 100 grams is still too sweet (especially for those of you who have a history of diabetes), you can reduce it.
5. Also, prepare one large-sized egg; my recommendation is to use omega chicken eggs, which are usually available at supermarkets. Why? Because the color is better, and if you calculate that omega chicken eggs are much cheaper than the normal chicken eggs that you buy by retailing at the stall.
6. Prepare also 1/4 tablespoons of vanilla essence. If it's not enough, you can add it up to a maximum of 1 tablespoon.
7. And finally, prepare 27-30 grams of milk powder. For this one, you can buy milk powder sachets. No need to buy until one box hehe
Now, if you have all the ingredients above. We can start to make it. Here's the recipe:
1. While heating the Oven, Mixer all of the following ingredients in your mixer bowl: 150 grams of butter + 50 grams of margarine + 1 egg (omega if available) + 1/4 tablespoon of vanilla essence + 27-30 grams of powdered milk. Mix all the ingredients until the mixture is quite soft, fluffy, and slightly pale in color. If so, turn off the mixer.

Credit Image: @roti_rinn
2. Now, enter the flour and refined sugar little by little into the mixture and stir well with the help of a spatula. Yep, you have to stir it manually. Do not use a mixer.
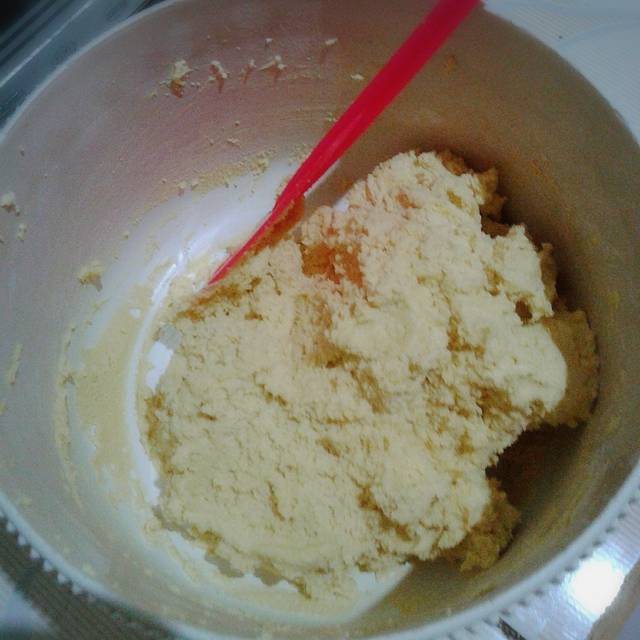
Credit Image: @roti_rinn
3. If you have, prepare a baking sheet that has been spread with thin margarine and sprinkled with a little flour, so that later it will not be sticky. Or you can also use a baking sheet that has been given a base of baking paper.
4. Form the dough according to your taste by using a piping bag or triangular plastic, or if it isn't there, you can use the usual mold used to make "kastengel". For the shape of the print according to taste, or if you are confused, you can follow the popular form of danish biscuits by searching for images on Google hehe

Credit Image: @roti_rinn
4. Finally, bake until cooked and change color. For the temperature used and the length of time for the roasting, please adjust to your own oven. Because there are usually different ovens, the temperature and length of the roasting time are just right.
How? It's easy to make popular danish biscuits at home, right?
Happy baking and cooking :)
How? It's easy to make popular danish biscuits at home, right?
Happy baking and cooking :)

.png "Touchscreen Jadi Tidak Berfungsi Setelah Upgrade ke Android 16? Ini Penyebabnya! (Khusus HP Samsung)")


